3D Graphics, Tutorials and Tips
Using 3DS Studio Max and Mental Ray

3D Graphics, Tutorials and Tips
Using 3DS Studio Max and Mental Ray


Dr. Who's arch-nemesis, the Dalek as classic Genesis and New Series versions
H.M.S. Nelson, big gunned capital warship from WWII
Edwardian house. Old school architectural renderings
Assorted models and renders
These tutorials focus on using the Mental Ray renderer (iRay tutorials in preparation). The production shaders enable the easy integration of 3d Models into photographs.
These renders have been created to visualise scientific concepts and experimental layouts. A 10 minute HD film was also created.
Geological Waste Disposal Bluray/HD 2009
Geological Waste Disposal DVD 2003
PSG Experiment - Grimsel (Nagra)
Rendering and compositing of 3D models for international Clients
Front cover for Burton Power Catalogue 2012
Front cover for Burton Power Catalogue 2014
Front cover for Burton Power Catalogue 2015
Front cover for Burton Power Catalogue 2016
Wavemaster Design : Ferry design renders
Car Colour Services : Colour and spraying services
Volkswagen Crafter for Volkswagen Australia
DMMultimedia | 3d tutorials | Brake Disc Mapping
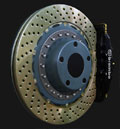 This Max 9 Tutorial shows a method to create realistic brake discs and textures without the overhead of complex modelling with associated high polygon count. The final Brake Disc will be more than sufficient for most cases. Also discussed are some Mix mapping techniques. I have included all the bitmaps I created for this tutorial.
The basic 3DS Max 9 scene ![]() , which includes the Brake Disc, can be downloaded here (100 Kb). This scene includes the basic material setup but not the caliper. The full materials setup is explained in the following tutorial. There are material slots predefined in the Scene for the textures.
, which includes the Brake Disc, can be downloaded here (100 Kb). This scene includes the basic material setup but not the caliper. The full materials setup is explained in the following tutorial. There are material slots predefined in the Scene for the textures.
Textures (Download the Zip 5.9 Mb) required :
1. Scene setup
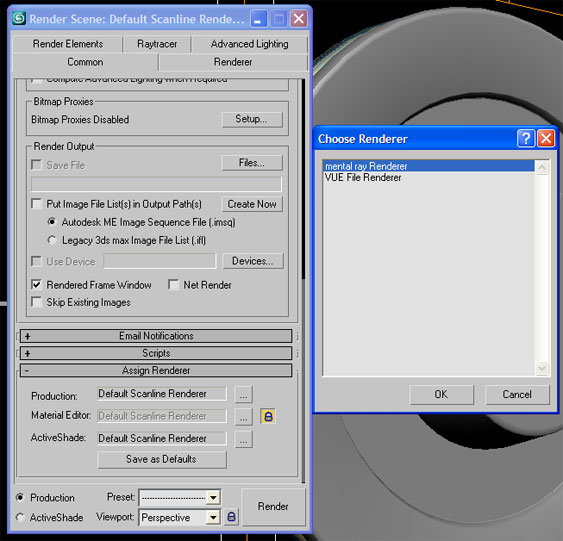
The scene includes a simple geometry object which will be our Brake Disc and 2 simple MRomni lights. It will already be setup for using Mental Ray, but if you are using your own scene change to MR from the Common tab in the Render Dialogue. Click on the Production selector and choose mental ray Renderer as shown below.
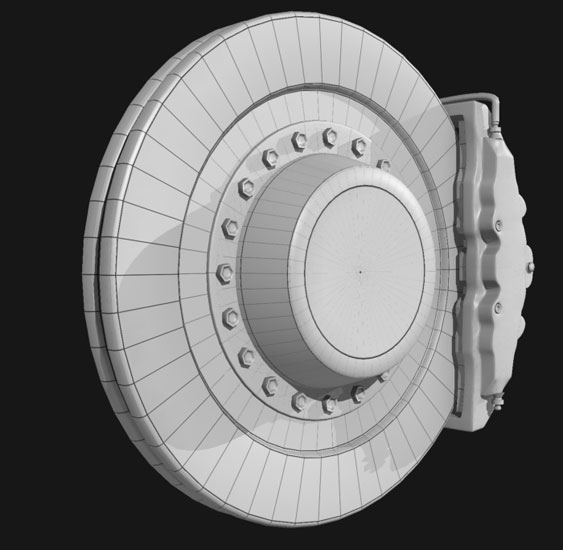
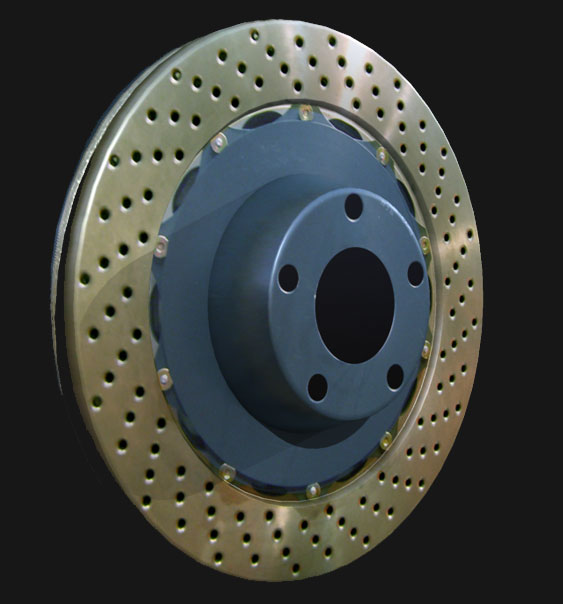
The supplied Brake Disc object shown below was created from a simple Cylinder object converted to an editable poly. Then some of the edges were moved and manipulated (See here for some tips to make your own) to match our bitmap. It does not use any smooth/turbosmooth modifiers.
2. Texturing
With the simple Brake Disc object created we will now create the textures. First thing to do is apply a UVWmap modifier to the object as shown below. This allows us to adjust how the texture is mapped onto the disc.

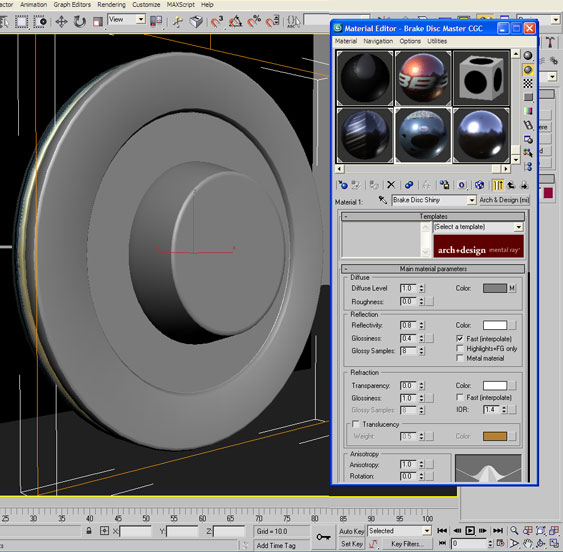
Now we are ready to create the texture. As we are using Max 9 we will use an Arch & Design material. This new material allows us to use quick glossy reflections (blurred reflections) which are a property of real Brake Discs. Load in an Arch & Design material into a slot (name it Brake Disc Shiny) and set it up with the settings shown below for Reflectivity and Glossiness. Also tick the Fast Interpolation option (this enables faster, but less accurate blurry reflections which are sufficient for our needs). These values setup a nice reflective but blurry texture for a Brake Disc.
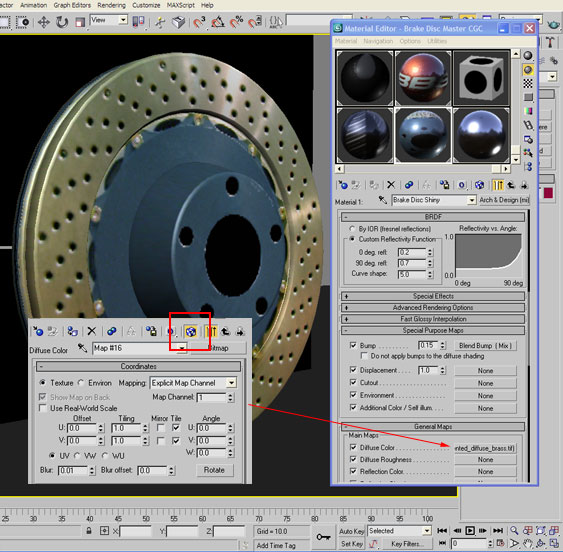
With the basic Reflectivity, Glossiness and Fast Interpolation values set, scroll down and adjust the following values. In the BRDF section for the reflection curves adjust the 90 Deg refl. value to 0.7. Ignore the Bump Map at present it will be discussed later. Add a bitmap to the Diffuse Color slot and load in the colour bitmap. Set the Blur to 0.01 and enable the Show Map in Viewport option so we can see the bitmap on the object in our viewport.
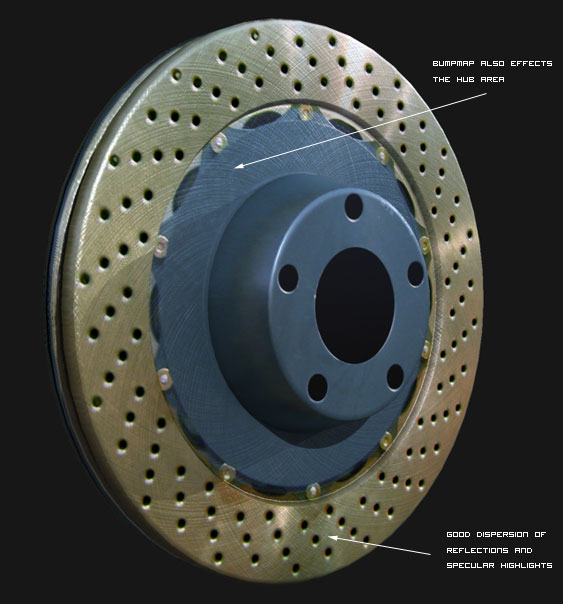
One final thing is to add a bitmap to the Environment slot for our reflections. This is where you can add your favourite HDRI or gradient map (for best results in this example a bitmap with a light upper half and dark lower half should be used). This will add to our blurred reflections. With a good environment loaded hit render. This what you should get (may differ depending on what Environment bitmap used) :
This might be good enough for most cases but we can improve on it a little. To add a little texture add a bitmap to the Bump slot of our material. I used the cross hatched bitmap that is in the CG-Cars Texture Library. With this added to the Bump slot (see above for location) this will give us :
The roughening of the surface works wonders for our brake disc texture but it is not required on the Hub area. There are many ways to adjust that. The simplest method is to load in your bump map texture into Photoshop and cut away some of the cross-hatching texture. But I will quickly explain another method using a Mix map. We will blend our existing bump map with a flat bump map.
Load a Mix map into our bitmap slot - Keep the old map as a sub map. This should give you the following setup :
To control our mix we add a Gradient Ramp to the Mix Amount slot (See above). It is a little tricky to see how this looks so I created a simple basic texture in a separate slot and copied the Gradient Ramp (right mouse click over the Gradient Ramp slot) and pasted (as an Instance) into the Diffuse Color slot of our new basic material (I used a cube as shown) - we will use this to see our changes in the viewport. Make the Gradient Ramp visible in Viewport as shown before and add the texture to the Brake Disc. It should look something like below :
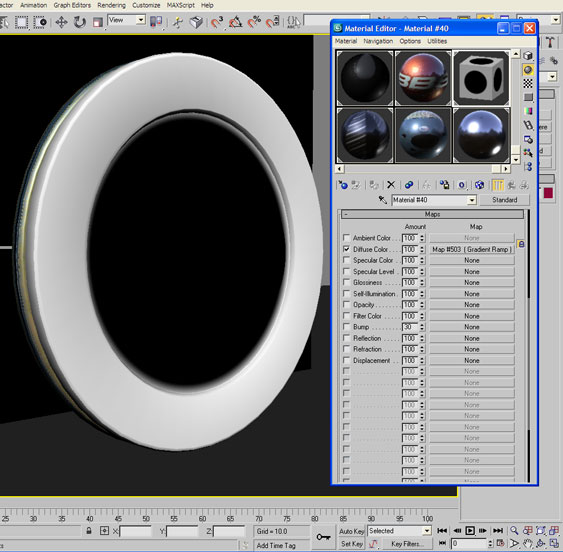
Now, by adjusting our gradient ramp we can see directly in the viewport what is happening. Setup the Gradient Ramp with the values and positions for the gradient colours (only black or white) and set Gradient Type to radial as shown below :
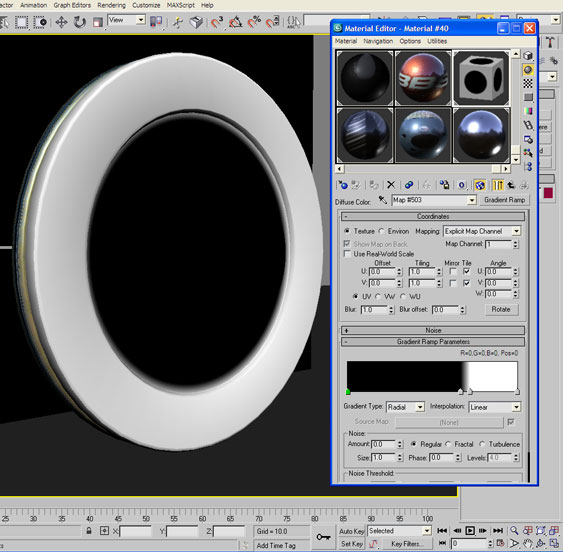
If you correctly copied and instanced the Gradient Ramp the original Brake Texture we were creating should now use the same Gradient Ramp settings. Check that is the case and copy the new Gradient Ramp across if required.
Now re-apply our original Brake Disc material and if we do a test render we should get the image below. Note where the Gradient Ramp was white it uses the bump map and not in the black areas. This technique will be used later.

Now that is better but one following fault remains. The whole brake disc is bump mapped and reflective. This is not correct for the black holes. So we very easily create another blend between the material we created and another material that is NOT reflective or specular. I created a bitmap mask for this using photoshop - download here.
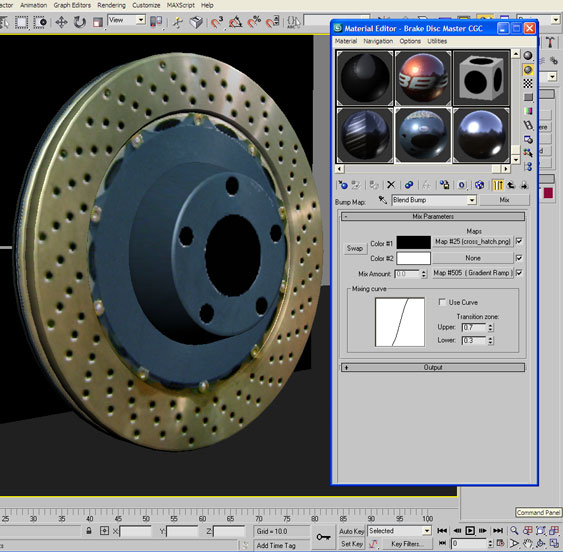
Load a Blend material into the Brake Material we were creating and keep the old map as a sub map. I named this updated material Brake Disc Master CGC. This should look like this :

I added a standard material in the Material 2 slot and named it No Spec. This has the values for Specular Level and Glossiness settings - both set to 0. Add the brake disc map to the Diffuse Color slot. This will be the material used for the holes in the brake disc. This means the holes will not reflect or have any specular highlights, exactly what we want.
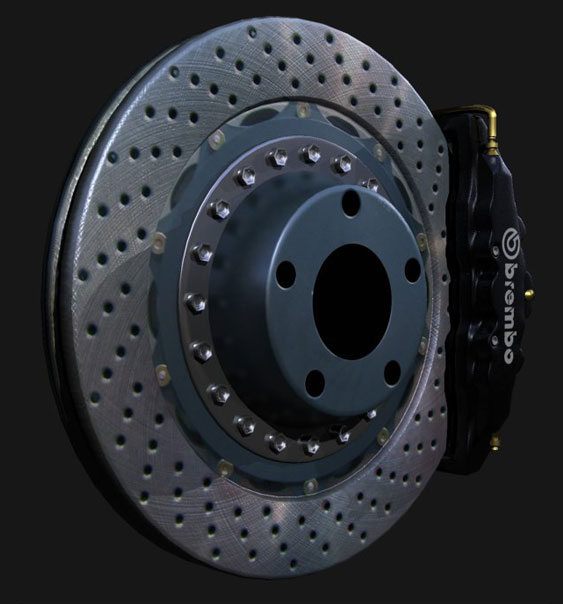
Add a caliper and some more detailing bolts and render to get this :

I have also created a silver version of the diffuse bitmap. To use it replace the Diffuse Color in the Brake Disc Shiny and No Spec in our blended material. This will produce a slightly different look :
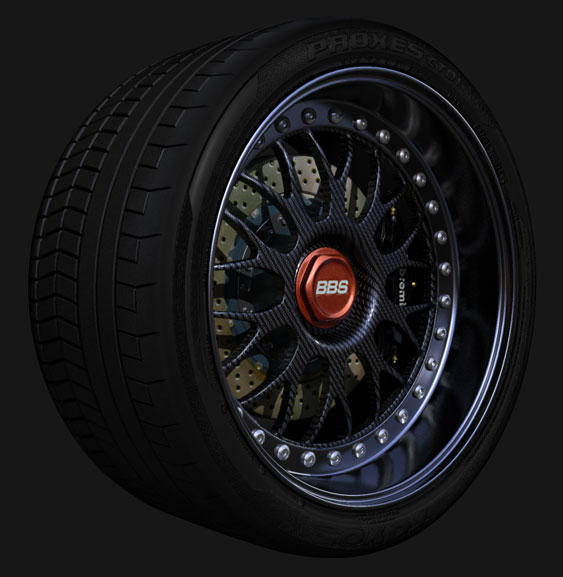
Tuck these discs behind your rims and you get the following. Here using the BBS created using the BBS Alloy tutorial.