3D Graphics, Tutorials and Tips
Using 3DS Studio Max and Mental Ray


3D Graphics, Tutorials and Tips
Using 3DS Studio Max and Mental Ray


Dr. Who's arch-nemesis, the Dalek as classic Genesis and New Series versions
H.M.S. Nelson, big gunned capital warship from WWII
Edwardian house. Old school architectural renderings
Assorted models and renders
These tutorials focus on using the Mental Ray renderer (iRay tutorials in preparation). The production shaders enable the easy integration of 3d Models into photographs.
These renders have been created to visualise scientific concepts and experimental layouts. A 10 minute HD film was also created.
Geological Waste Disposal Bluray/HD 2009
Geological Waste Disposal DVD 2003
PSG Experiment - Grimsel (Nagra)
Rendering and compositing of 3D models for international Clients
Front cover for Burton Power Catalogue 2012
Front cover for Burton Power Catalogue 2014
Front cover for Burton Power Catalogue 2015
Front cover for Burton Power Catalogue 2016
Wavemaster Design : Ferry design renders
Car Colour Services : Colour and spraying services
Volkswagen Crafter for Volkswagen Australia
DMMultimedia | 3d tutorials | Rounded Corners & AO
The Arch&Design material (introduced in Max 9, but here shown in Max2009 Design) gives some excellent additional parameters over the standard Max material. It gives us the ability to add rounded corners to sharp edges (this is a visual effect and does not alter the geometry) and also allows us to add local Ambient Occlusion detailing. If used carefully these effects can subtley add more realism to a render. Try yourself with this scene file (![]() Max 2009 - 26 kb) - see below.
Max 2009 - 26 kb) - see below.
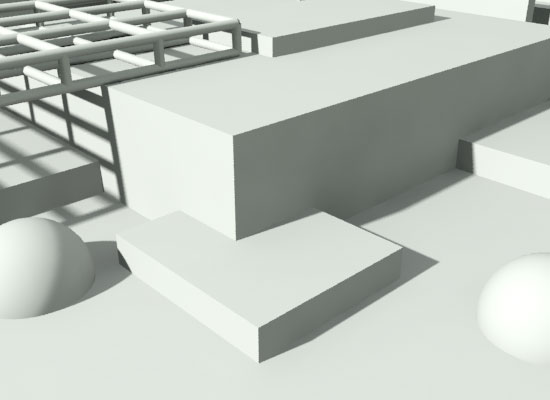
The above image shows a simple scene made up of simple geometry (spheres and boxes). A single mr Area Spot Light and Skylight are added and units set to metres (set to unitless - see Tutorial 10) and Final Gather (FG) enabled with draft settings. As you can see it is quite sharp and flat. We will now add AO Detailing.
Arch&Design Ambient Occlusion detailing
Load in an Arch&Design material. Open the "Special Effects" panel. Enable Ambient Occlusion. The panel shown below is from Max 9, Max 2009 has an additional option : Use Color from other materials which we won't be using.
Enabling Ambient Occlusion will produce additional shadows dependent on how close this material is to other geometry. It is controlled by the Max Distance value (default 0.1m) and the Samples value (default 16). Small values for Max Distance will only add a slight additional shadow, while greater values will make this effect more pronounced. Samples adds more resolution to the AO shadows. Normally the default value for Samples is perfectly OK as most AO shadows are only used for subtle effects - so leave this at default.
Why use AO detailing ?
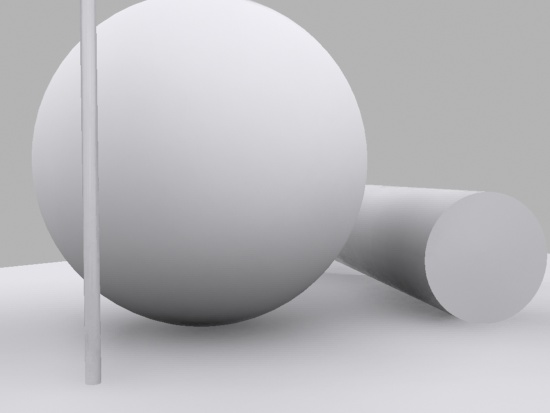
It is very good for enhancing the FG lighting. For speed FG is not so refined in solving illumination and therefore is not good for showing really fine shadows. An example of this is if we place a sphere and a 2 cylinders on a surface (this could also be a table leg on a floor, or a tyre on a road). Enabling just a Skylight and FG you can see that the sphere and cylinder look like they are floating (See below).
We could adjust the settings of FG to higher (and much slower) settings and this will improve slightly - but is some cases it may require VERY high values with VERY slow rendering times.
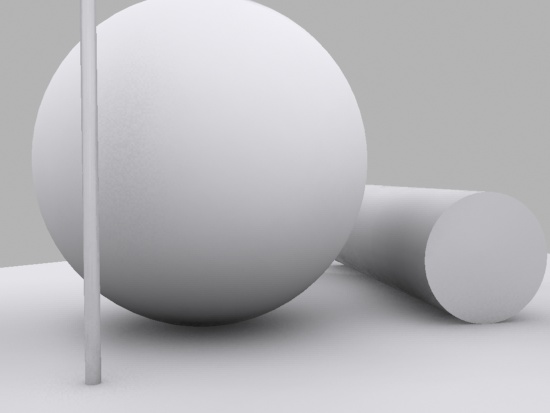
A much better result is achieved with enabling Ambient Occlusion for adding detail. If we apply this Arch&Design material with AO enabled we get the following result. Remember that it is best practice to set up your scene in units (m), it makes it easier to calculate how far you want the AO to spread out in metres.
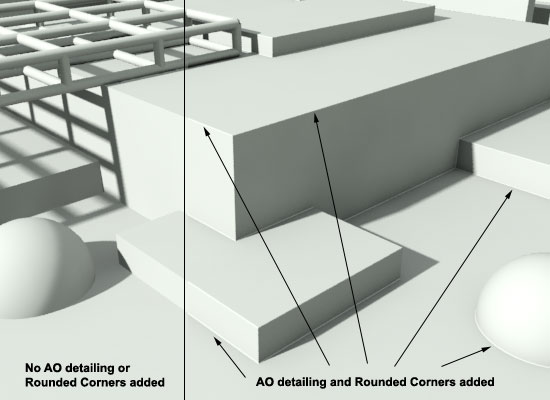
If we add an Arch&Design AO detail enhancement to our default scene we get the following:
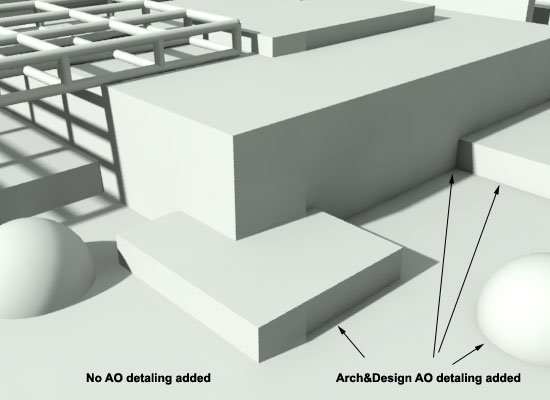
As you can see this adds a nice degree of detail to sharp corners or contact points. It is very useful when you want to create a simple "Clay Render" image.
TIP: You can add a simple Arch&Design material with AO enabled and low reflectivity to the Material Override slot in the Processing tab under render options. Enable Final Gather in Draft mode and you will get a quick and detailed "Clay Render".

Arch&Design Rounded Corners
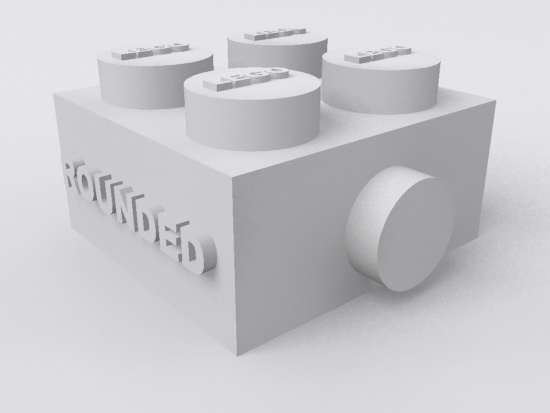
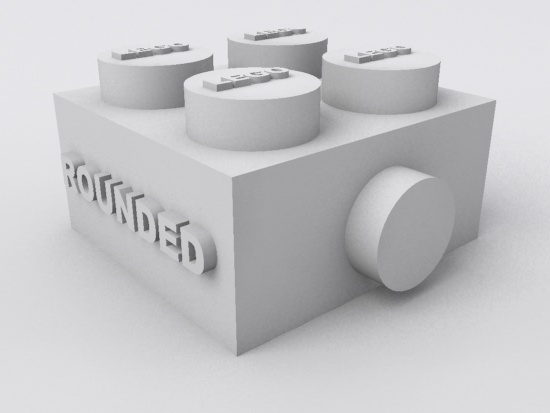
One of the easiest ways to spot a computer rendered image are the razor sharp edges on corners. If you are modelling an object you will take time to add geometry to slightly soften these edges. But for a quick and simple effect the Rounded Corners effect can be used. This does not alter the geometry and is a bump shader - so should be used for subtle effects only. Using this effect carefully can add an extra level of realism to your images for very little work.
Again you should set your scene up in metres (m) so you know what level you are applying. It should ALWAYS be a subtle effect - just adding a slight roundness to an edge, it should not be used to put a large round radius on an object.
The fillet radius sets the rounded corner effect - best to keep this relatively small in comparison with the size of your object.
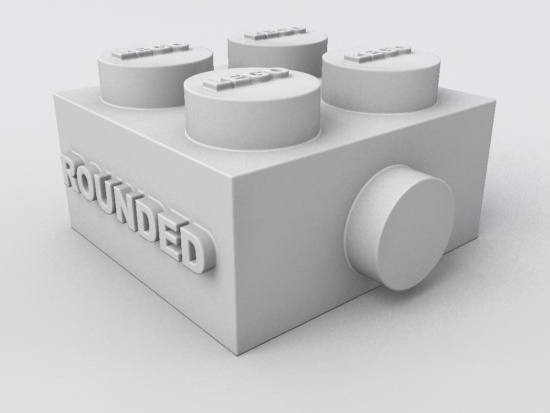
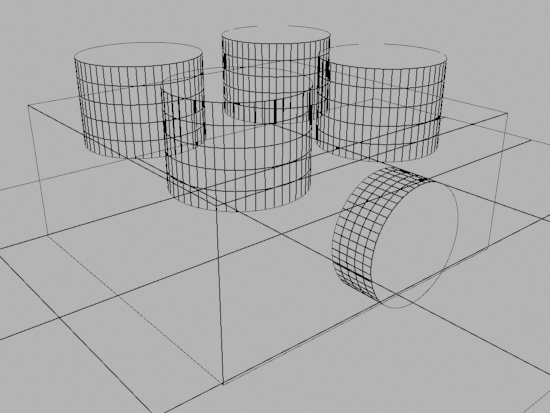
By default the "Blend with other materials" is not enabled - so by default any object assigned this material will also create rounded objects if the objects are touching or intersecting, but NOT other objects which have different materials. So if we create a Lego style brick using simple geometry (a simple box and simple cylinders) and apply a red Rounded Corners to the parts of teh brick (but NOT to the ground plane) we get this effect : where all the objects with the red material have rounded corners which blend with each other.
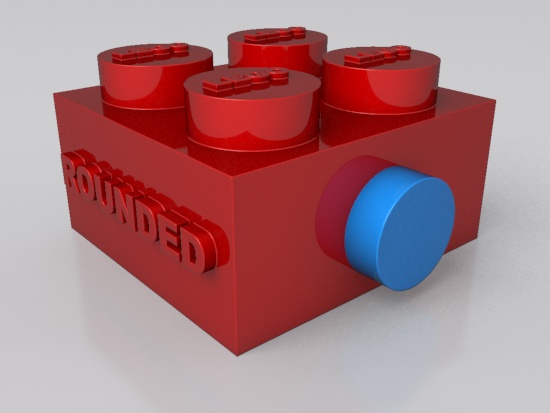
If you want the red material to blend with all other objects we enable "Blend with other materials" and the red material will now also blend with the blue material and ground plane.

Quickly add a smooth edge with rounded corners to Logos or text created with text input and extrude without using Bevel.
Adding some rounded edges to our default scene we get this :
The effect is slightly exaggerated for this shot, but you can see the nice rounding effect it has on the sharp edges of the boxes and where the sphere intersects the floor (this effect can also be used to simulate the capillary action of water curving around objects).
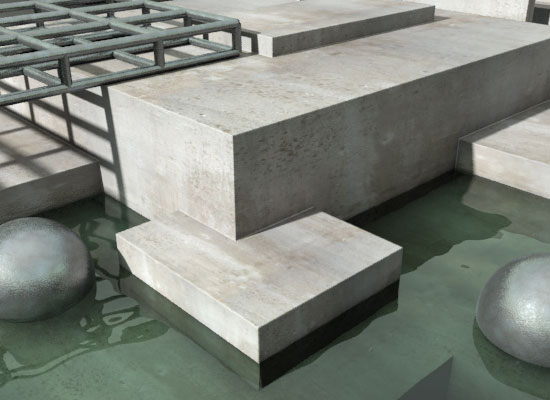
If we add some simple textures to our scene we get the following image. Nothing special, but lots of these added details all add up to more realism. The water material will be explained in Tutorial 12.
Overview of AO Detailing and Rounded Corners.
Try yourself with this scene file (![]() Max 2009 - 26 kb). The scene is setup with material over-ride enabled using material slot 2 when you load it (See above for description of material override). Adjust material 2 ("Arch&Design AO Over ride"), enabling/disabling AO and Rounded corners to test. Disable over-ride to play with the coloured materials.
Max 2009 - 26 kb). The scene is setup with material over-ride enabled using material slot 2 when you load it (See above for description of material override). Adjust material 2 ("Arch&Design AO Over ride"), enabling/disabling AO and Rounded corners to test. Disable over-ride to play with the coloured materials.