
3D Graphics, Tutorials and Tips
Using 3DS Studio Max and Mental Ray


3D Graphics, Tutorials and Tips
Using 3DS Studio Max and Mental Ray


Dr. Who's arch-nemesis, the Dalek as classic Genesis and New Series versions
H.M.S. Nelson, big gunned capital warship from WWII
Edwardian house. Old school architectural renderings
Assorted models and renders
These tutorials focus on using the Mental Ray renderer (iRay tutorials in preparation). The production shaders enable the easy integration of 3d Models into photographs.
These renders have been created to visualise scientific concepts and experimental layouts. A 10 minute HD film was also created.
Geological Waste Disposal Bluray/HD 2009
Geological Waste Disposal DVD 2003
PSG Experiment - Grimsel (Nagra)
Rendering and compositing of 3D models for international Clients
Front cover for Burton Power Catalogue 2012
Front cover for Burton Power Catalogue 2014
Front cover for Burton Power Catalogue 2015
Front cover for Burton Power Catalogue 2016
Wavemaster Design : Ferry design renders
Car Colour Services : Colour and spraying services
Volkswagen Crafter for Volkswagen Australia
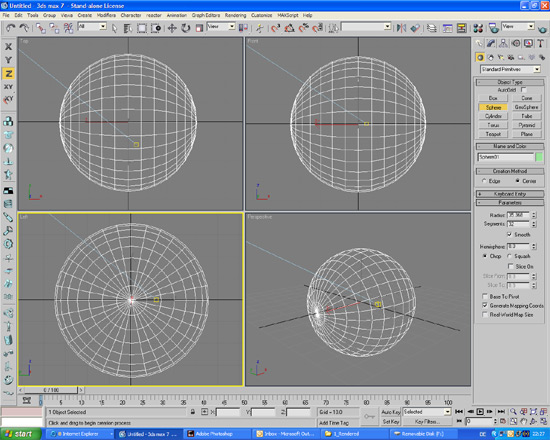
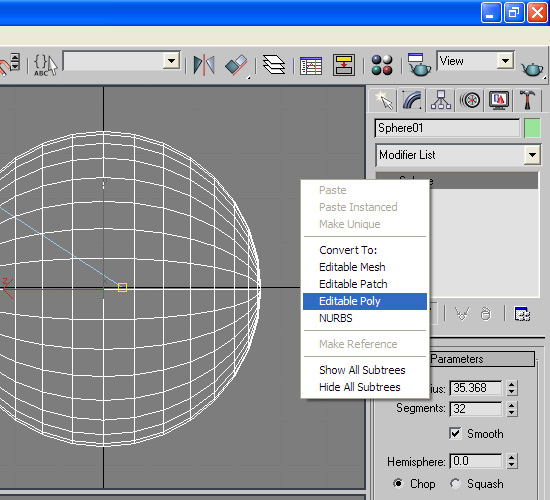
DMMultimedia | 3d tutorials | Headlight - Spherical | Modelling the Headlight


Part 1. Modelling the headlight
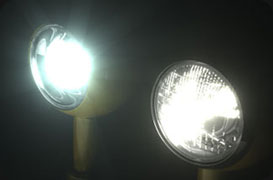 Headlights are an important part of any car model.
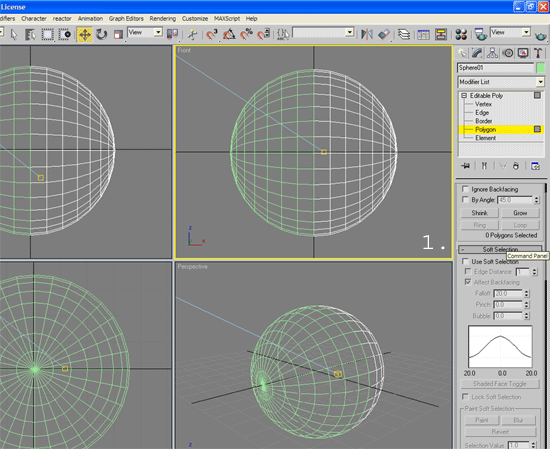
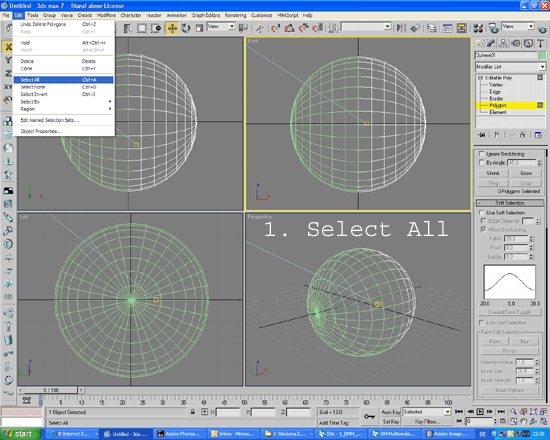
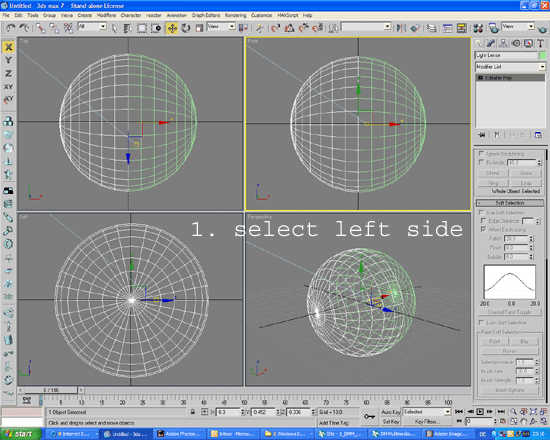
In this tutorial I will outline how to make a quick and simple round headlight using 3D Studio Max 7/7.5 and mental Ray - although it should be perfectly possible to use earlier versions (and later versions).
The second part will outline a method for texturing the light lens with refracting, bump-mapped glass using the Architectural shader
In the third part I show the Glare and Glow Mental Ray effects for a standard halogen, and Xenon effect bulbs = with animation. The same techniques can be used for non-spherical headlights too.
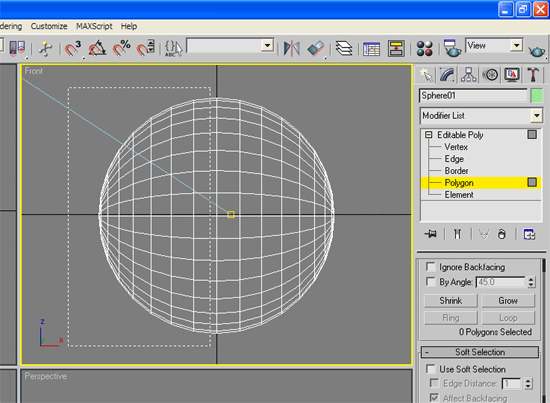
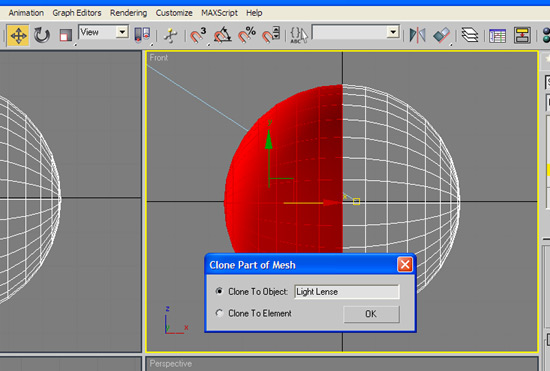
As a finishing touch - take a ring of Polys from the outer edge of the Lens, detach them, extrude the edges back and and use those as a chrome ring around the edge of the Lens. See the render in Part 2. Texturing the Headlight