
3D Graphics, Tutorials and Tips
Using 3DS Studio Max and Mental Ray


3D Graphics, Tutorials and Tips
Using 3DS Studio Max and Mental Ray


Dr. Who's arch-nemesis, the Dalek as classic Genesis and New Series versions
H.M.S. Nelson, big gunned capital warship from WWII
Edwardian house. Old school architectural renderings
Assorted models and renders
These tutorials focus on using the Mental Ray renderer (iRay tutorials in preparation). The production shaders enable the easy integration of 3d Models into photographs.
These renders have been created to visualise scientific concepts and experimental layouts. A 10 minute HD film was also created.
Geological Waste Disposal Bluray/HD 2009
Geological Waste Disposal DVD 2003
PSG Experiment - Grimsel (Nagra)
Rendering and compositing of 3D models for international Clients
Front cover for Burton Power Catalogue 2012
Front cover for Burton Power Catalogue 2014
Front cover for Burton Power Catalogue 2015
Front cover for Burton Power Catalogue 2016
Wavemaster Design : Ferry design renders
Car Colour Services : Colour and spraying services
Volkswagen Crafter for Volkswagen Australia
DMMultimedia | 3d tutorials | BBS Alloy | Modelling the Main Centre of the BBS Alloy


Part 1. Modelling the Main Centre of the BBS Alloy
 To get the best from this tutorial it would be best if you read the previous tutorial for the RS Alloy to get an idea of what I will be doing - this tutorial will probably not repeat some moves and move quite quickly.
If you want to model along, the REF pic is available HERE. It is ready to use directly in the viewport background - It has already been processed in Photoshop.
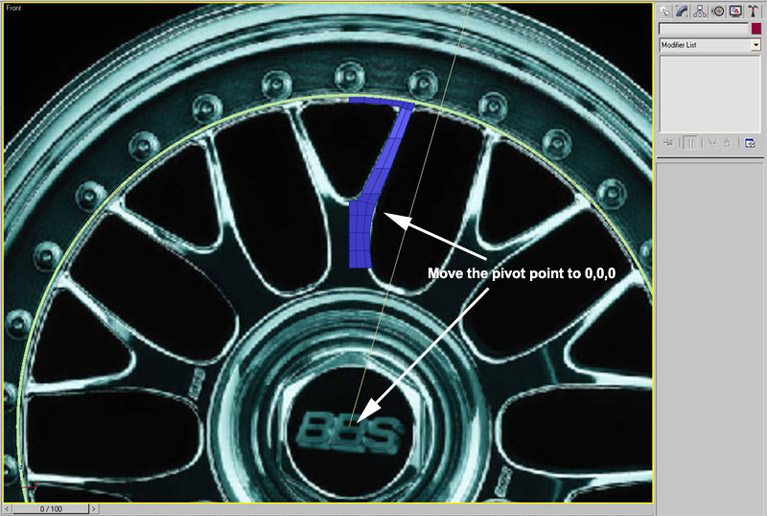
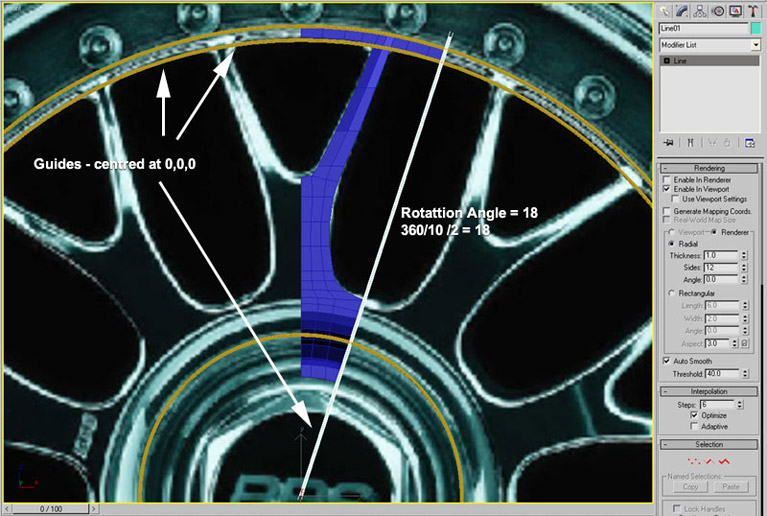
With the Ref pic loaded, again make a plane and convert to an Editable Poly. Move the pivot point to 0,0,0 and make sure the vertices on the left hand side are all at x=0. Also add a straight line spline (using the Snap Toggle) draw from the centre 0,0,0 out. Then rotate this 18 degrees - (360 /10 spokes)/2.
Keep modelling the edges out, keeping the edges within the boundaries - also put a little sweep back to the spoke as it goes to the outer rim - you will see this clearer in the later pics, but do it now as you create new edges up the spoke ! Just move each new set of vertices a little back.
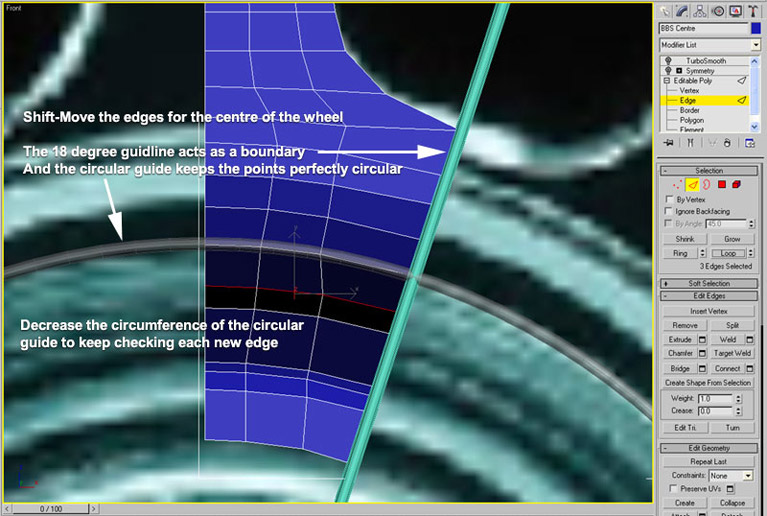
Always draw some circular guides (centred at 0,0,0) so that the outer rim will be round ! When you have finished modelling with the vertices of the rim touching the guides, select the edges that need to be extruded, and the first extrude can be quite large to keep a nice smooth shape to the spokes. Then extrude a couple more times.

For the centre of the rim it is again IMPORTANT that you use a circular spline guide. You can then just adjust the circumference to match the new edges as you create them.
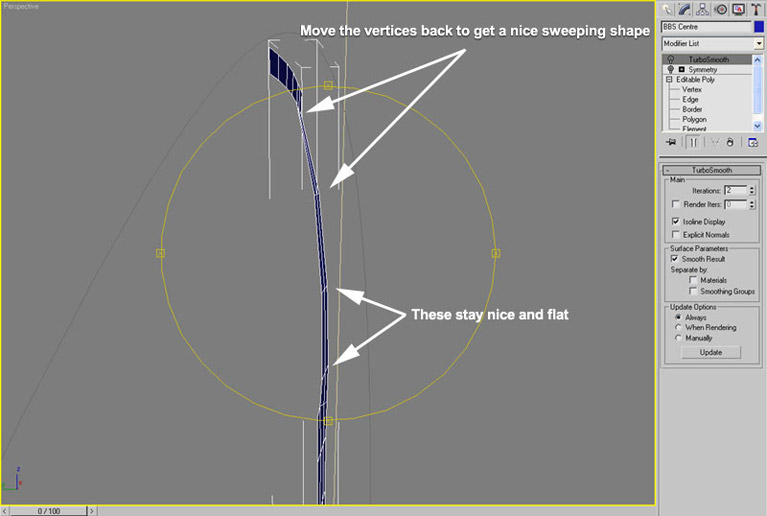
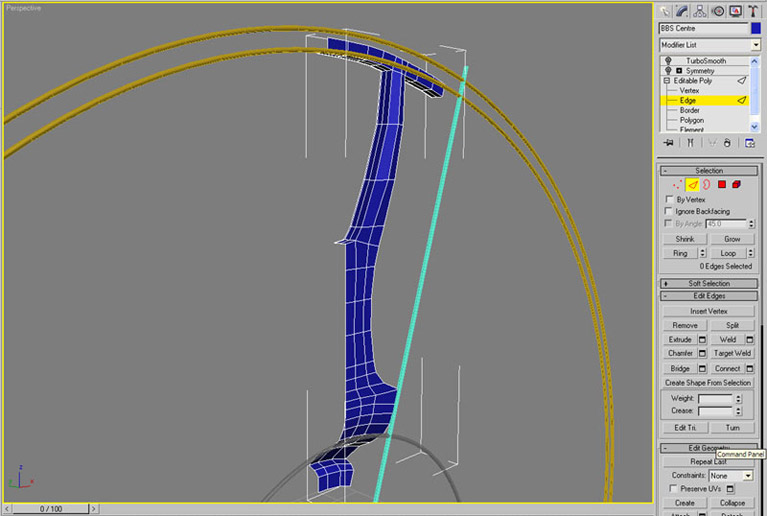
Also as you create each new edge go to a side view and pull the selected edges back until you get the sweeping shape.
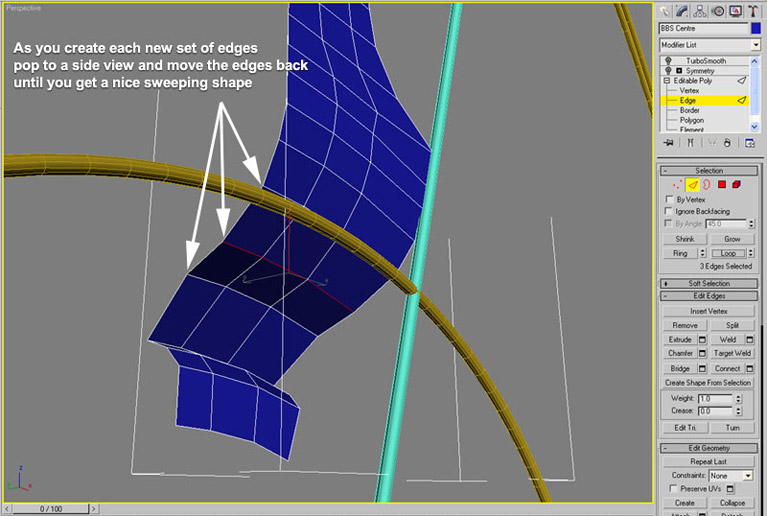
This will give us a shape like this :
Now add the Symmetry modifier :
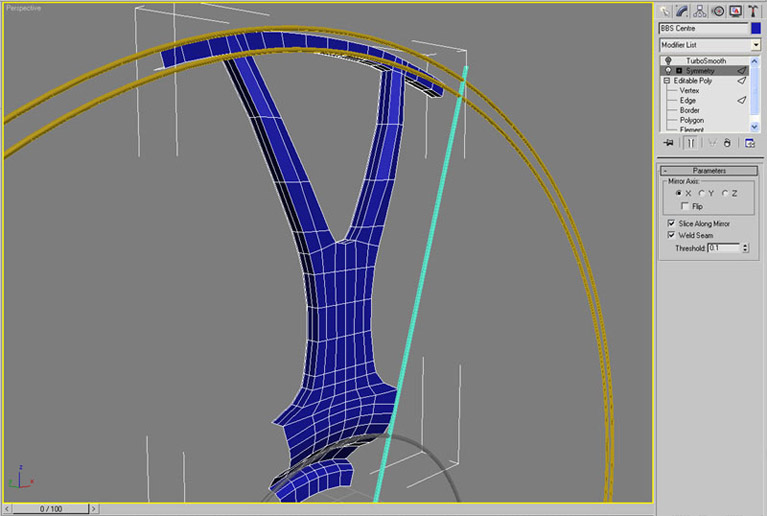
And the Turbosmooth modifier :
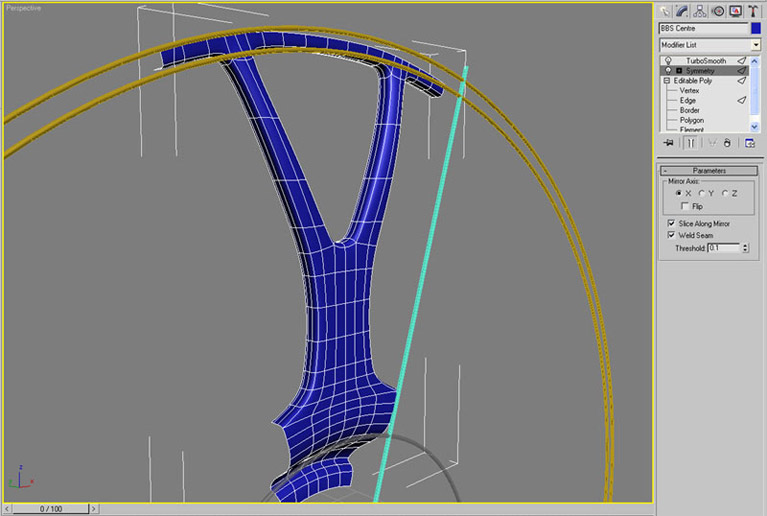
You can adjust edges here to get a deeper dish etc.
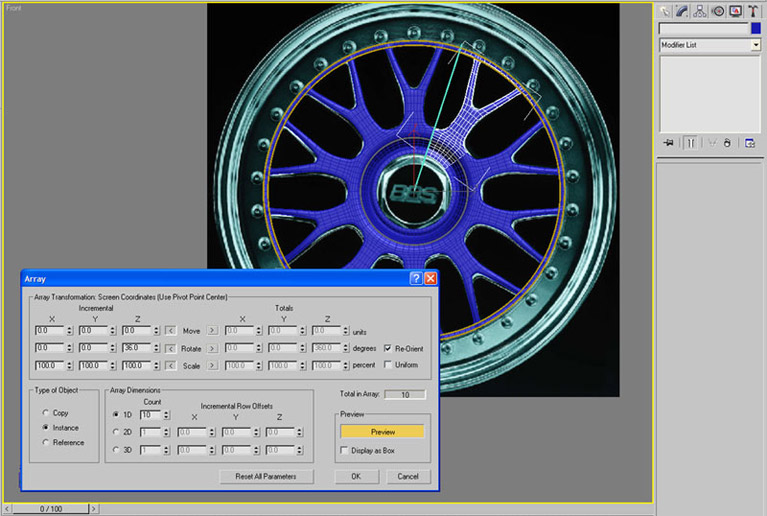
Now add an Array with these parameters :
Continue to : Part 2. Modelling the hubcap