3D Graphics, Tutorials and Tips
Using 3DS Studio Max and Mental Ray

3D Graphics, Tutorials and Tips
Using 3DS Studio Max and Mental Ray


Dr. Who's arch-nemesis, the Dalek as classic Genesis and New Series versions
H.M.S. Nelson, big gunned capital warship from WWII
Edwardian house. Old school architectural renderings
Assorted models and renders
These tutorials focus on using the Mental Ray renderer (iRay tutorials in preparation). The production shaders enable the easy integration of 3d Models into photographs.
These renders have been created to visualise scientific concepts and experimental layouts. A 10 minute HD film was also created.
Geological Waste Disposal Bluray/HD 2009
Geological Waste Disposal DVD 2003
PSG Experiment - Grimsel (Nagra)
Rendering and compositing of 3D models for international Clients
Front cover for Burton Power Catalogue 2012
Front cover for Burton Power Catalogue 2014
Front cover for Burton Power Catalogue 2015
Front cover for Burton Power Catalogue 2016
Wavemaster Design : Ferry design renders
Car Colour Services : Colour and spraying services
Volkswagen Crafter for Volkswagen Australia
DMMultimedia | 3d tutorials | BBS Alloy | Texturing and Lighting


Part 4. Texturing and Lighting
In this part I will explain step by step my chrome setups for this wheel. I'll also explain the lighting setup - though it is a very simple default setup. As a lot of the information in the images are settings and numerical values a larger version of the image is available by clicking on the image.
Texture for the outer Rim : Chrome. NOTE : THis uses a very old standard raytrace material setup. Much better results can be achieved using Mental Ray or iray. See the Metal textures tutorial for more details.
First you will need to download the free HDRI pack from :
http://www.deviantart.com/deviation/9597501/
The HDRI I have been using is SM_HDRI-Pack1-05.hdr
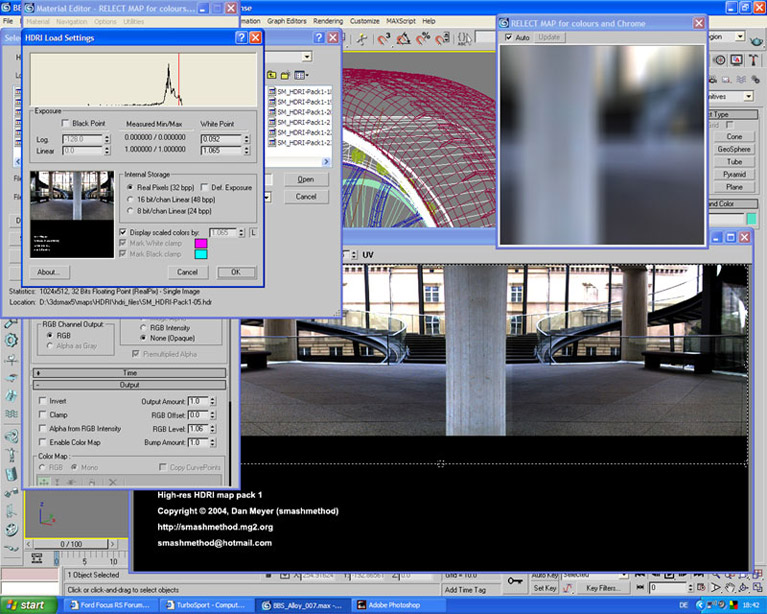
In the material editor load in a bitmap to a new slot. Load the Bitmap using the following settings :
When loading the Bitmap - in the HDRI setup, White point should be set to
Log. : 0.092
Linear : 1.065847
In the Bitmap properties panel Set the Blur offset to 0.02. This will slightly blur the main HDRI. Most chrome alloy blurs the reflections a little. You can do this with blurry reflections but this uses up a LOT of processing time and the end result is very similar to this method. Even using blurry reflections objects closer to the chrome are less blurry - so almost the same effect here as the only thing close to the wheel Rim is the wheel Rim.
Apply some cropping to the Bitmap, you can see from the screen shot, but the setting is 0.65
Set the RGB level to 1.06
That is the HDRI for the alloy setup.
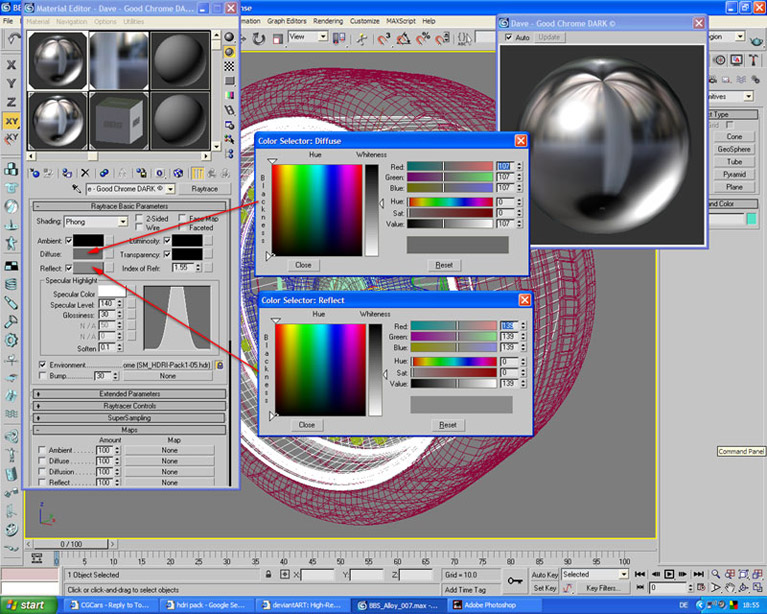
Now in a another map slot set the material to Raytrace.
Set the Specular color to white,
Specular Level : 140
Glossiness : 30
The Diffuse colour set to 107 and the reflect (colour) set to 139 as below.
Drag and drop the HDRI to the Environment slot - make an instance.
Voila - one Chrome Mat.
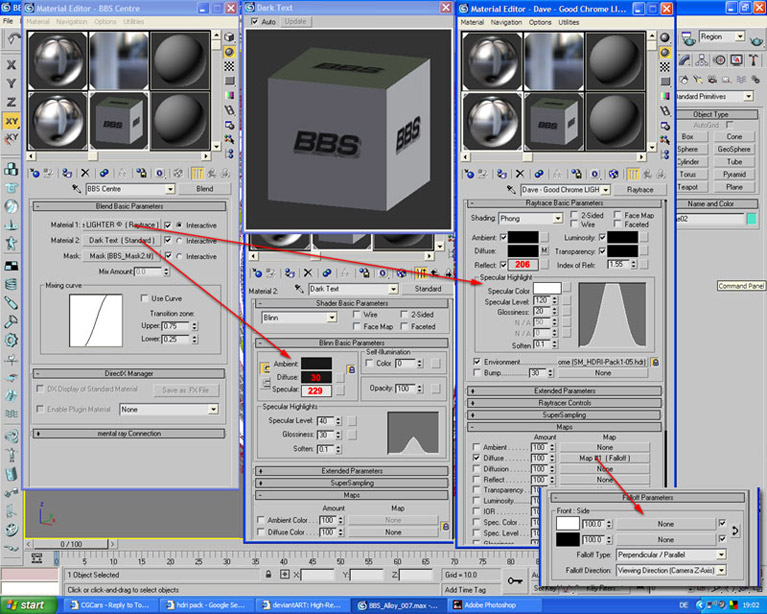
The rim centre is a blend between a black material and a variation of the Mat above. The screen shot below should show all the settings I used - I've photoshopped them alltogether - you won't of course see tham like that in Max !
The mix map is the one I gave a link to in part 1. You can download it. You van also see that I added a UVW Map for the mask - you can see that in earlier screen shots.
The Chrome as shown below is applied on its own to the wheel spokes.
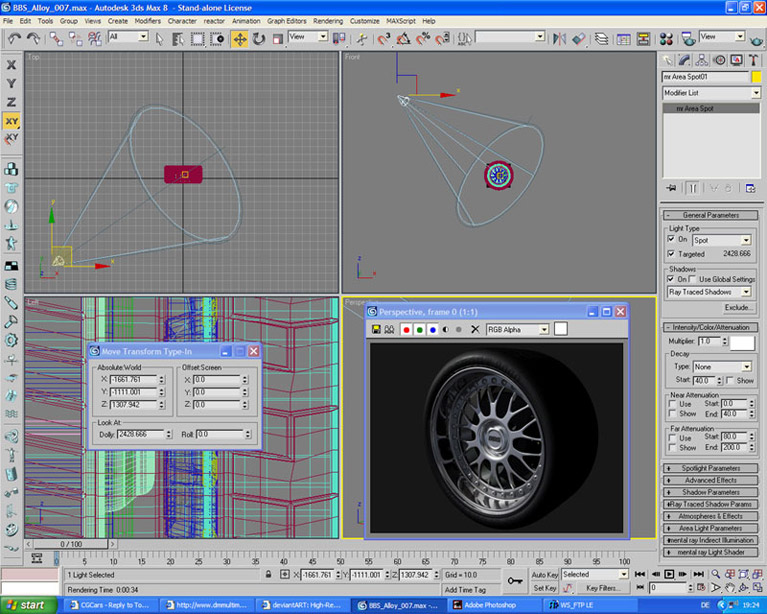
Next - Lighting. Very quick.
One MR Area Spot at
X : -1661.761
Y : -1111.001
Z : 1307.942
All other settings are Default. Simple. You might need to adjust the position of your lights if you have a different scale but you can see the approx position I used.