3D Graphics, Tutorials and Tips
Using 3DS Studio Max and Mental Ray


3D Graphics, Tutorials and Tips
Using 3DS Studio Max and Mental Ray


Dr. Who's arch-nemesis, the Dalek as classic Genesis and New Series versions
H.M.S. Nelson, big gunned capital warship from WWII
Edwardian house. Old school architectural renderings
Assorted models and renders
These tutorials focus on using the Mental Ray renderer (iRay tutorials in preparation). The production shaders enable the easy integration of 3d Models into photographs.
These renders have been created to visualise scientific concepts and experimental layouts. A 10 minute HD film was also created.
Geological Waste Disposal Bluray/HD 2009
Geological Waste Disposal DVD 2003
PSG Experiment - Grimsel (Nagra)
Rendering and compositing of 3D models for international Clients
Front cover for Burton Power Catalogue 2012
Front cover for Burton Power Catalogue 2014
Front cover for Burton Power Catalogue 2015
Front cover for Burton Power Catalogue 2016
Wavemaster Design : Ferry design renders
Car Colour Services : Colour and spraying services
Volkswagen Crafter for Volkswagen Australia
DMMultimedia | 3d tutorials | Headlight - Spherical | Texturing the Headlight


Part 2. Texturing the headlight
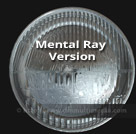
NEW : These textures have been updated to Mental Ray settings - see the next Texturing a car headlight with Mental Ray section.
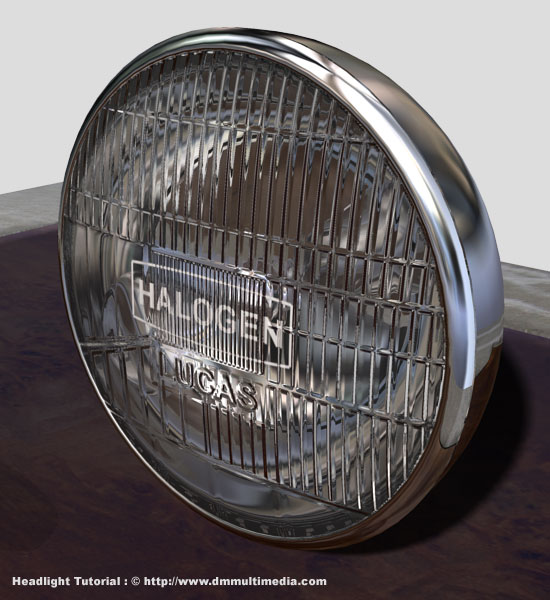
In this section I will explain one method to generate realistic lights. There a MANY ways to get the same results - I am presently experimenting with MR Textures. The method shown in this tutorial will enable the generation of results like this:
In the above example I use just 2 textures as shown below.
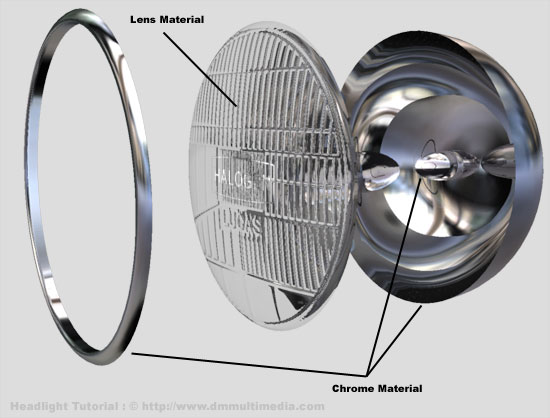
Chrome Material
The chrome material used is simply a copy of the material used in the BBS Alloy wheel tutorial (See here). It is basically a Raytrace material using an HDRI Image Map for the reflection environment.
Note: Any map will do, but if you do not have a physical environment to reflect it is best if the map has a clear difference between upper and lower sections about the horizon line. That means the upper part of the light reflector will be darker than the lower as expected in real life.
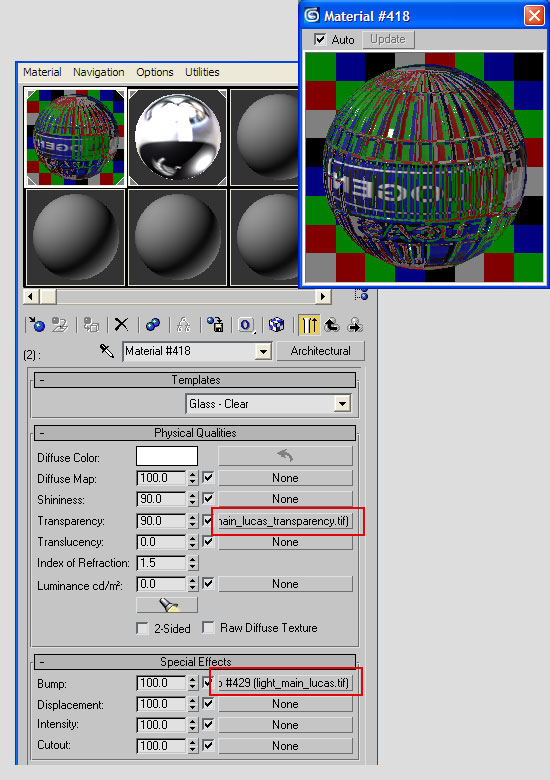
Lens Material
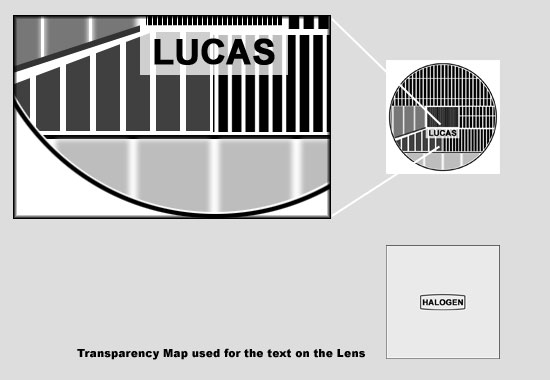
The Lens material uses an Architectural material with settings shown below. Note that there are also 2 separate Bitmaps used in the Transparency and Bump map slot. The Bump map creates the ridges and patterns of the lens. The (optional) Transparency map was used to highlight the "Halogen" text on the lens. See under for an explanation of the Bump and Transparency maps.
The Bump Map
The bump map is created in Photoshop. If you look at the full render above you can see that there are clearly defined sharp areas and also smooth bump areas. These are achieved by smoothing (using Gaussian Blur) the transition from black to white, along with different values of grey to adjust the magnitude of the bump:
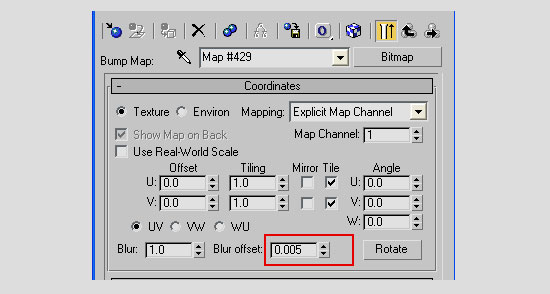
A subtle effect can also be achieved by altering the Blur offset. This can help smooth any sharp edges in your bitmap without using Photoshop.