3D Graphics, Tutorials and Tips
Using 3DS Studio Max and Mental Ray

3D Graphics, Tutorials and Tips
Using 3DS Studio Max and Mental Ray


Dr. Who's arch-nemesis, the Dalek as classic Genesis and New Series versions
H.M.S. Nelson, big gunned capital warship from WWII
Edwardian house. Old school architectural renderings
Assorted models and renders
These tutorials focus on using the Mental Ray renderer (iRay tutorials in preparation). The production shaders enable the easy integration of 3d Models into photographs.
These renders have been created to visualise scientific concepts and experimental layouts. A 10 minute HD film was also created.
Geological Waste Disposal Bluray/HD 2009
Geological Waste Disposal DVD 2003
PSG Experiment - Grimsel (Nagra)
Rendering and compositing of 3D models for international Clients
Front cover for Burton Power Catalogue 2012
Front cover for Burton Power Catalogue 2014
Front cover for Burton Power Catalogue 2015
Front cover for Burton Power Catalogue 2016
Wavemaster Design : Ferry design renders
Car Colour Services : Colour and spraying services
Volkswagen Crafter for Volkswagen Australia
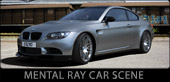
DMMultimedia | 3d tutorials | Production Shaders in Mental Ray | Using Production Shaders : A Car Scene - Sunny
This section will build on the previous sections, and add a 3D car to a backplate image. It will explain how to setup the scene for lighting, exposure settings and how to use the shaders. The Free background image and the HDRI to create the scene below are included so you can follow along.
In this free tutorial we will use the Environment/Background Switcher, Environment/Background Camera Map, Environment HDRI and Matte/Shadow/Reflection shaders to place a 3D car model into a photograph/backplate. This tutorial is constructed in Max 2013 Design - but it is possible to use some of these shaders (The shaders use slightly different names and gui layouts) in earlier versions of 3DS Max.
In this simple scene we will again use the following shaders:
Initial Setting up
We will use the same basic scene setup as in Parts 1 to 3. Please follow the setup instructions outlined in Part 1 and 2 for setting up units, exposure and materials (especially the matte/shadow/reflection, Camera Map and Environment/Background switcher).
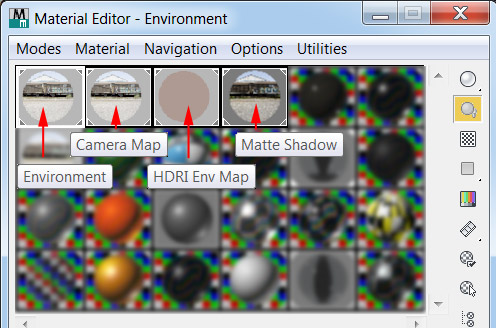
Setting up our Material Editor Slots
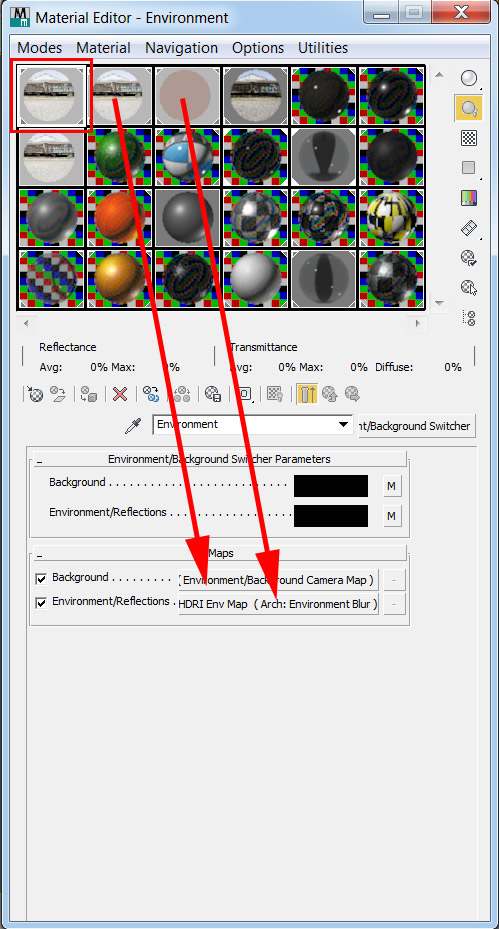
We will use the same basic setup from the previous scene. We will use an Environment/Background Switcher, an Environment/Camera Map (this is our background image), an Arch:Environment Blur shader with an HDRI 360 degrees image (this is used for reflections) and a Matte/Shadow/Reflections material. The basic setup of these shaders is shown below.
These are the main shaders we will be using:
This is the setup of the Environment/Background Switcher. It uses an instance of the Camera Map shader and the Arch:Environment Blur shaders. When you have the Camera Map and Arch:Env shaders loaded (see below for details), simply drag them onto the Environment / Background Switcher slots, and chose instance
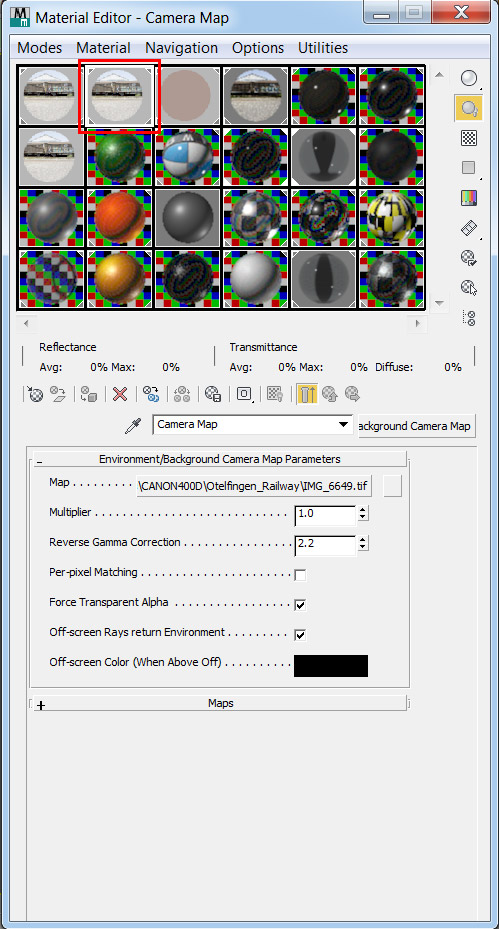
The Camera Map has the background image - in this case IMG_6649.tif. Again make sure your Reverse Gamma Correction is set to 2.2
The Arch:Environment Blur shader contains the 360 degree background HDRI. The Blur shader pre-blurs this reflection map for use with any of our Arch&Design materials that use glossy reflections - it makes them much smoother, without using a larger (and slower) amount of samples. For more background information on this shader see Zap's excellent Blog post here.
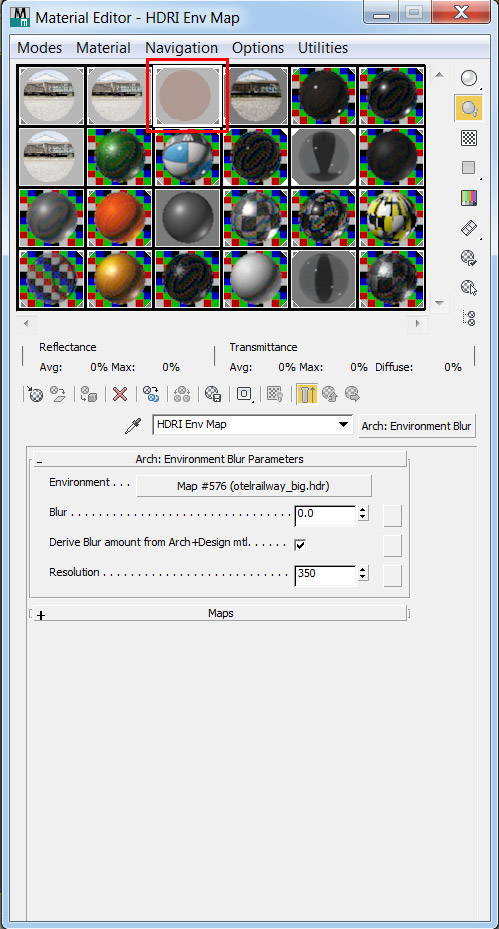
To the Arch:Environment Blur shader we add a standard Bitmap shader which is the 360 degree background HDRI (otelrailway_big.hdr). In this case we will set the offsets as shown with u = 0.02.

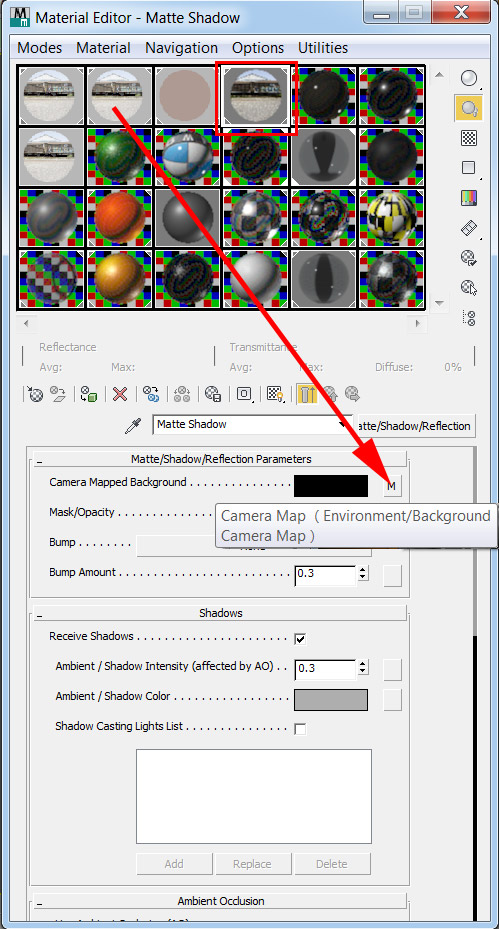
The Matte/Shadow/Reflection Material is used to display our cast shadows on the background image. Drag your Camera Map shader to the Camera Mapped Background slot (make it an instance). The settings of this shader will be discussed in more detail below.
The next step is setting the Exposure settings. The overall value of 8.1 was chosen. This was determined by setting the Exposure Value to 7.5 and rendering the scene (you can render the Scene using very low settings, it is only the light balance we are interested in) then adjusting the EV up or down so that the background image (Camera Map - IMG_6649.tif) has the correct exposure - it can match your original photo, but you can slightly over or under-expose it here to your tastes. To summarise, in this step we adjust the exposure value to make our background image have the correct exposure in the rendered image.
The image below also shows the Image Control settings I used, these adjust the contrast and highlight intensities.
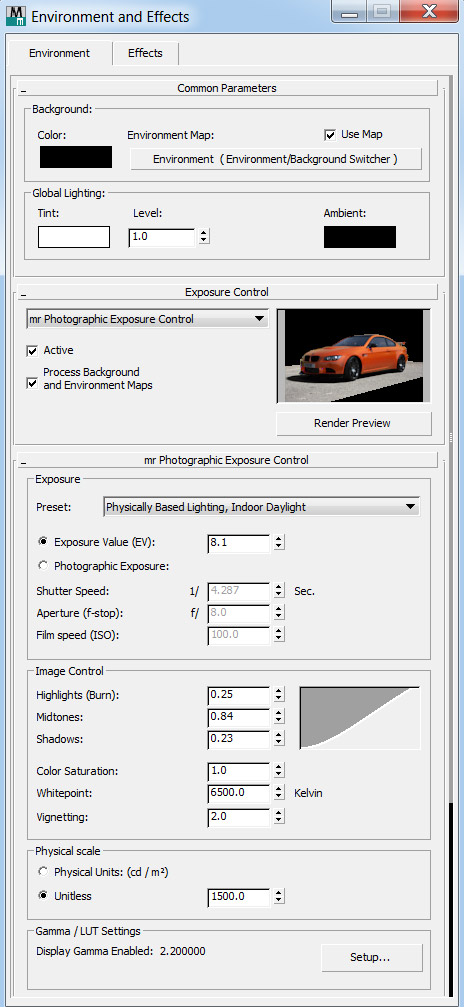
Using the above Exposure Value (EV) of 8.1 and rendering with very low settings (no objects are required just yet) I get this rendered image. If you adjust the EV value this image will get darker, or lighter. This is the exposure value I wanted for my backplate.
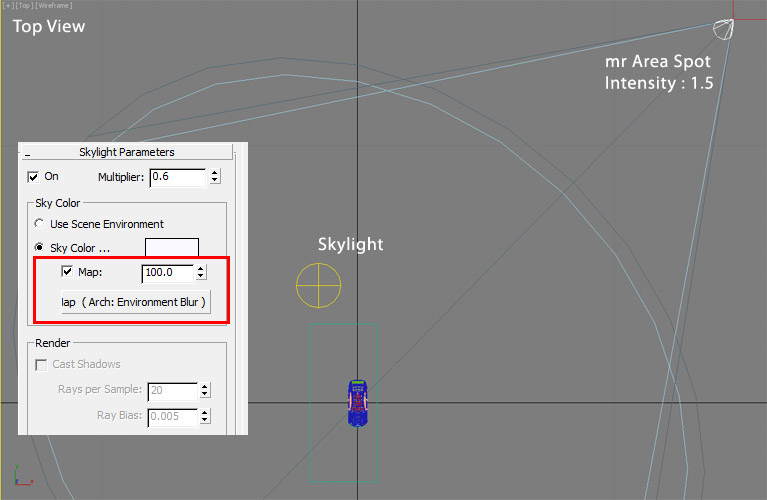
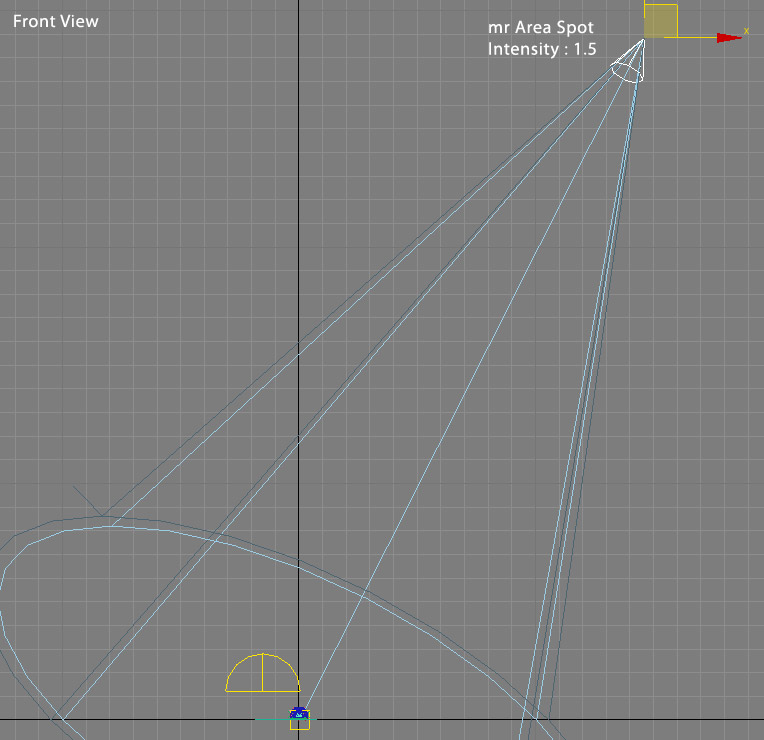
The next step is setting up the lights. In this scene we will have a Skylight to give global fill light, and an mr Area Spotlight which will represent the direct light from the sun. If you look at the 360 HDRI you can see the sun is high up and to the right of the car. Place your mr Area Spotlight in a position which is close to the position of the sun in the HDRI. The Skylight can be positioned anywhere, but add an instance of the Arch:Environment Blur shader to the Environment slot, and tick the Map option. The settings I used are shown below. The car I am using is positioned at 0,0,0 and there is a simple plane beneath the car which is our ground and will use the Matte/Shadow/Reflection Material.
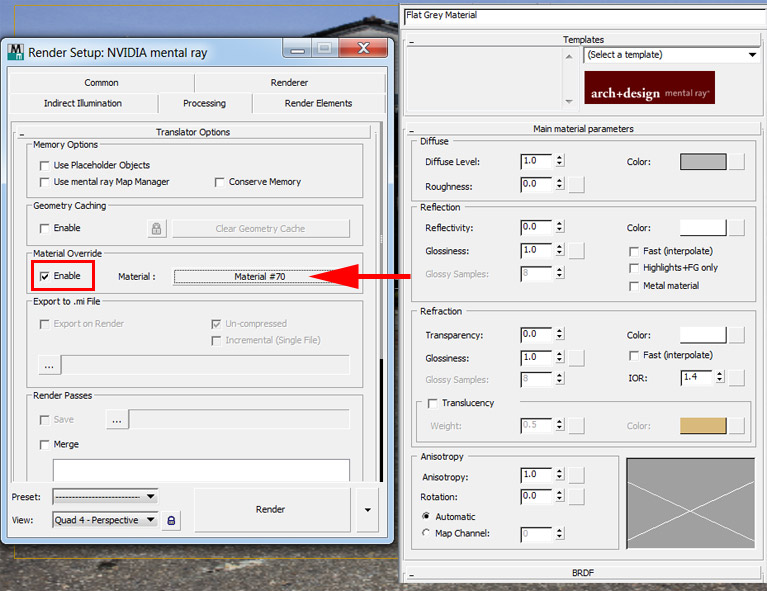
To determine the values to use for the lights I used a material over-ride in the Render setup - Processing panel which makes every object render with a single material. The material I used was a simple Arch&Design material with grey colour and no reflections. This material is dragged to the slot as shown below.
Rendering with the light intensities (as shown above, mr Area Spot at 1.5 and Skylight at 0.6) we get this output. I have rendered the images below with high sampling settings, but when you test you can use low render settings as it only the light balance we are interested in. This stage can take some time. How the light balance is set, is up to personal preferences as well as being accurate. Even writing this tutorial I was adjusting these values. :-)

With the basic lighting and exposure setup finalised, the last stage will be adjusting the Matte/Shadow/Reflection Material to give us the cast shadow properties we would like.This is done by adjusting the and the. In every case I switch off the option. The model I am using was not originally created to scale, so some of the values for AO Max Distance in metres may be wrong for your own setup
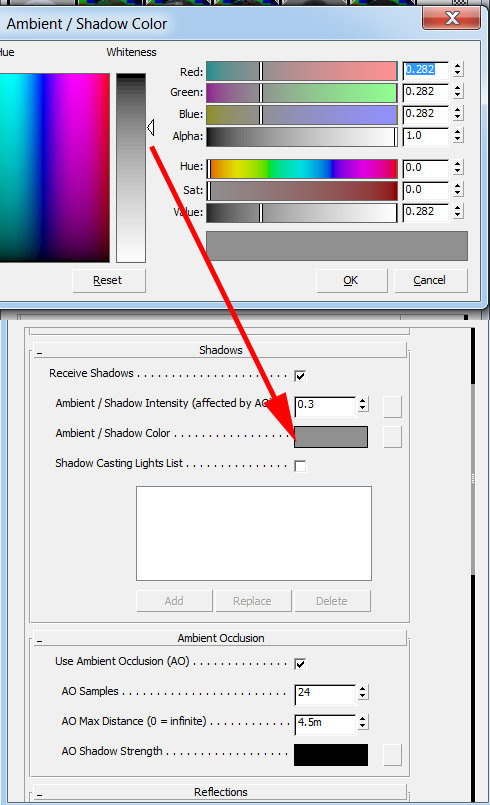
The following images show the effect of altering the Matte/Shadow/Reflection values. As these images show some subtle variation in shadow colours, you may have to view these on a good monitor if you don't see any differences.
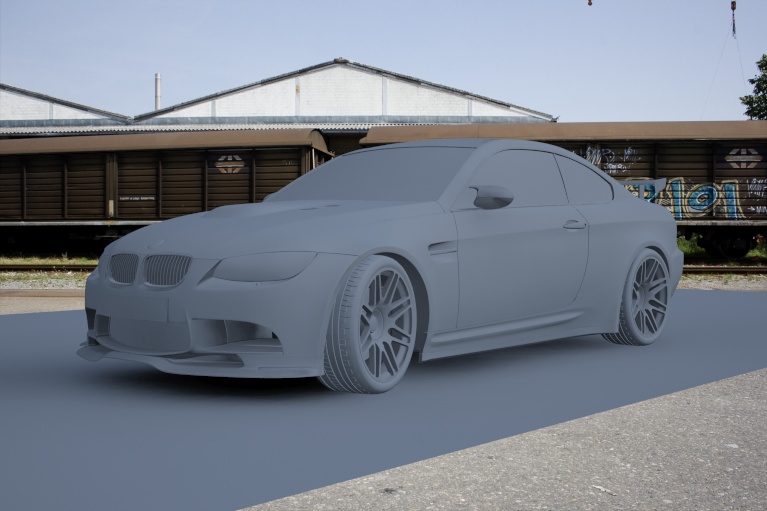
The first image shows the shadow colour setting (colour values as shown above) with the AO values switched OFF. This is basically the settings for the shadow that will be seen out in the open.
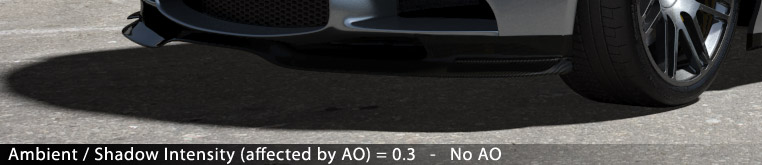
The strength of this shadow is altered by changing the Ambient / Shadow colour, but normally it shouldn't be too dark. This is the part of the shadow that is out in the open, so in real life this will be lit by the environment (indirect light).
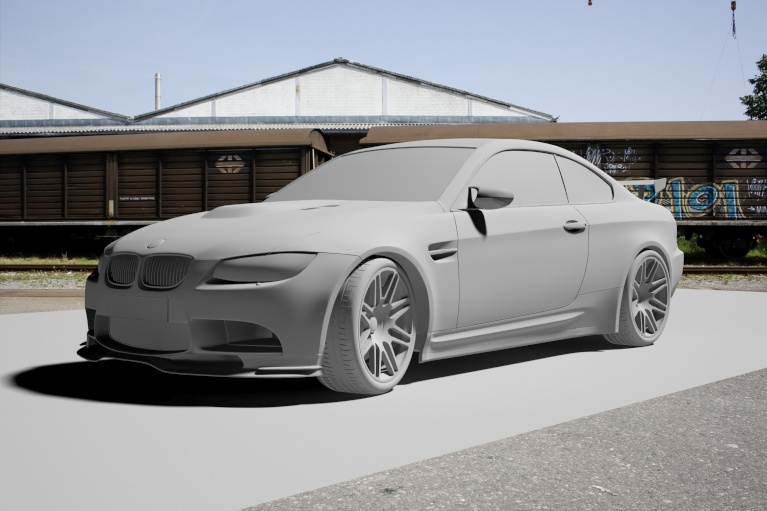
In real life the shadow strength under the car will be much darker, as the car blocks the direct and indirect light. This is where the AO settings come in - tick the Use Ambient Occlusion (AO) box. The AO adds extra shadow colour (in our case set to black) to areas covered by the car. The important setting here is the AO Max Distance. We can set that to light how far the AO will bleed into our main shadow. I chose 4.5m as it got the results I want in my scene, but that distance will vary according to how your scene is setup. NOTE : As the AO will be set at a distance it helps if your car has a flat undertray - you will get a much more controllable result.
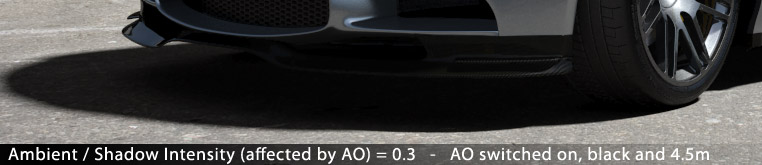
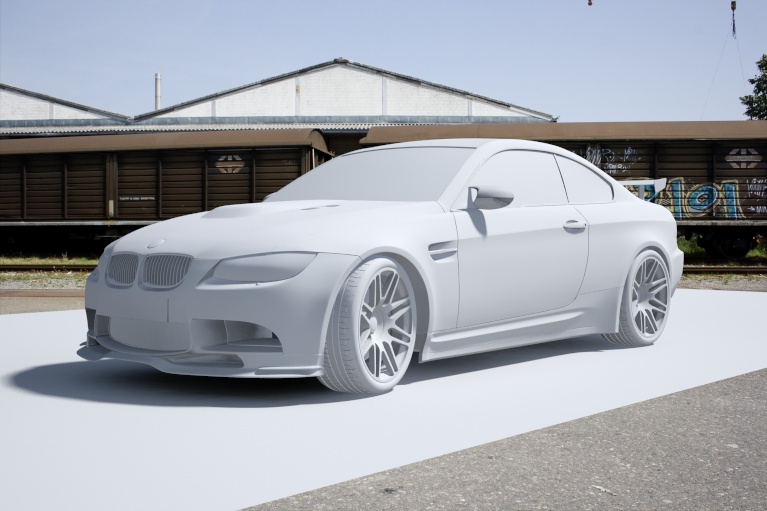
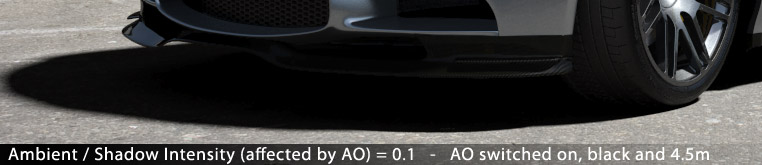
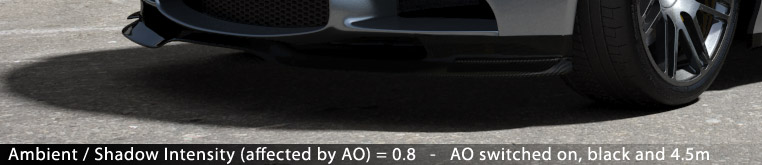
The strength of the AO shadow can be controlled by the Ambient / Shadow Intensity (affected by AO) value. The images below show how this is affected by increasing and decreasing this value (AO Max Distance is set to 4.5m for these images) . Lower values here give a shadow that is powerfully affected by the AO colour, higher values give a much less intensive adding of the AO colour.
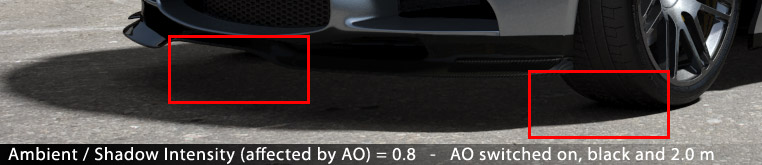
The AO Max Distance sets how far the AO Shadow fills the main shadow. To show this here the AO Max Distance has been set to 2.0m. The Ambient / Shadow Intensity (affected by AO) has been set to 0.8 to make the effect easier to see. Note that when the Max distance is small only objects close to the car contribute to the AO shadow - in this case very close to the tyres (shown below). Increasing the AO Max Distance will push the AO Shadow out from the car. Too much and the effect is lost. It should be a subtle effect.
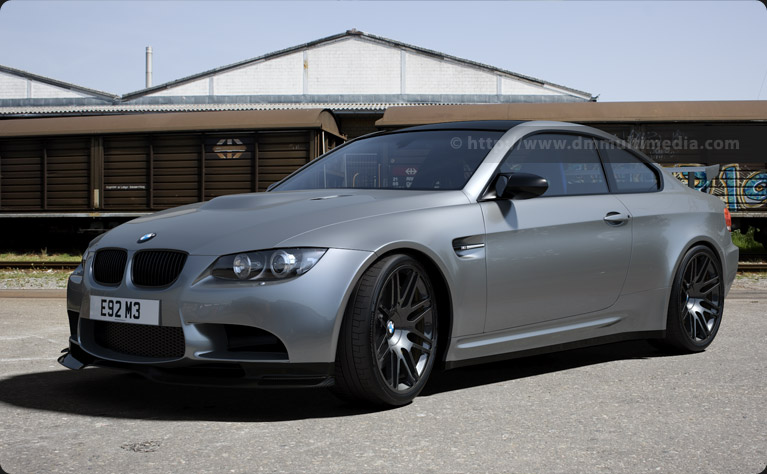
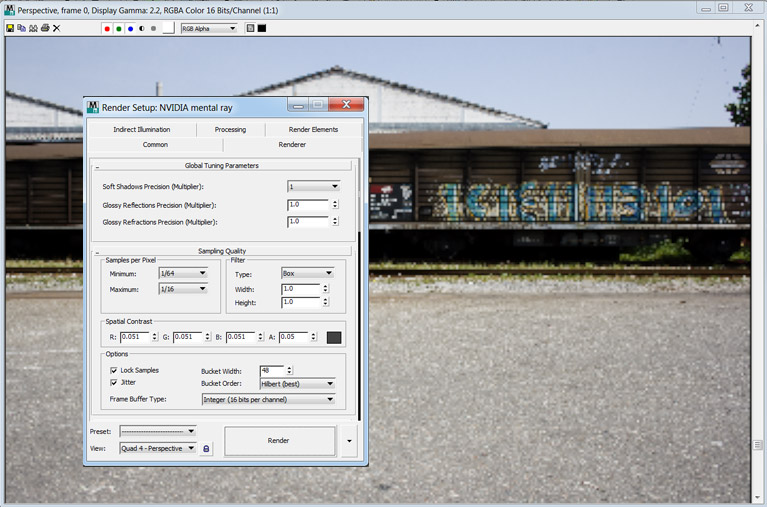
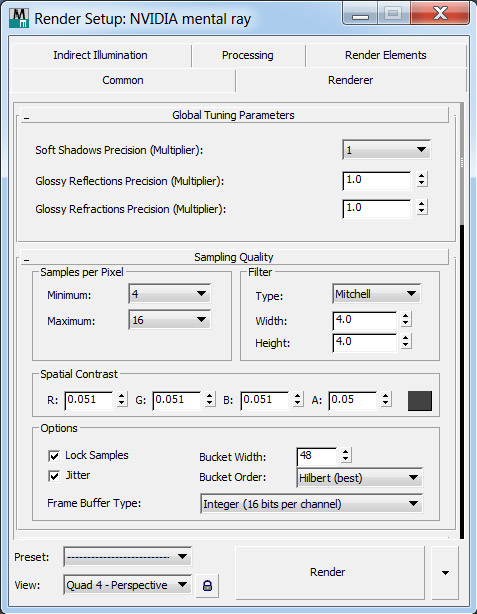
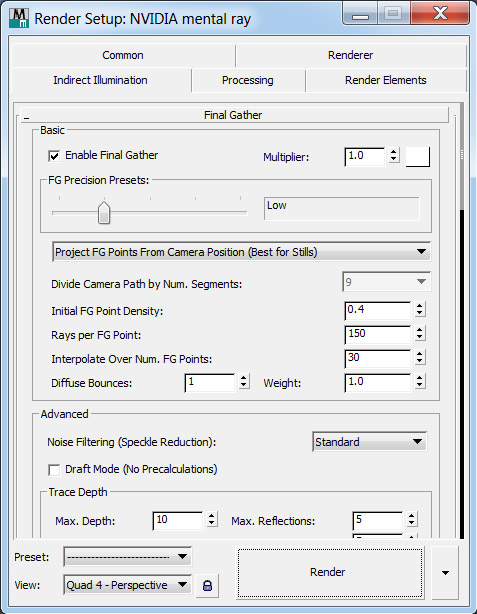
With the scene setup using the Mental Ray Production shaders (using the HDRI and Backplate supplied), the Lights setup, the Exposure adjusted and the Matte/Shadow/Reflection Material configured we can now create a render. The Mental Ray sampling settings and Final Gather settings I use for the final render are shown below.
The final render - direct from 3DS Max. Move your mouse over this image to view a more detailed image. This render uses the Silver Metallic A&D paint setup.